

Are you tired of dealing with the frustrating “Secure Boot enabled but not active” issue in Windows 11? This problem can prevent you from updating your operating system or running certain applications, leaving you feeling stuck and vulnerable to security risks. But don’t worry, we’ve got you covered In this article, we’ll delve into the causes of this issue, provide step-by-step solutions to fix it, and offer tips on how to prevent it from happening in the future.
Causes of Secure Boot enabled but not active
 Several reasons contribute to the Secure Boot enabled but not active issue in Windows 11:
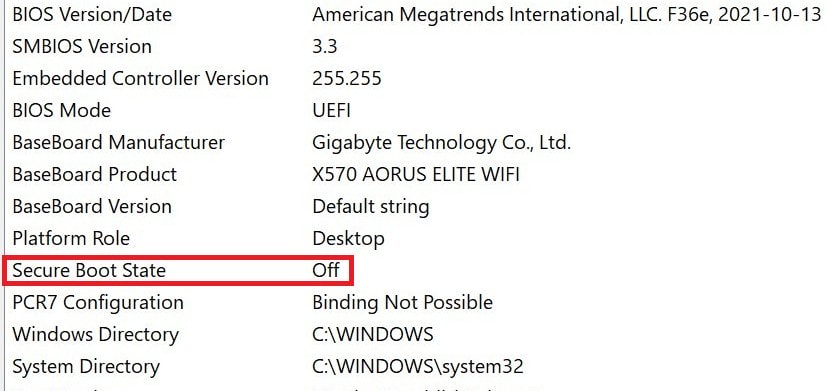
- Secure Boot disabled in UEFI firmware settings: If Secure Boot is disabled in the UEFI (Unified Extensible Firmware Interface) firmware settings, it may not be active even if it is enabled in the BIOS settings.
- CSM (Compatibility Support Module) enabled: CSM is a feature that allows legacy BIOS compatibility. However, it can interfere with Secure Boot and cause it to be inactive.
- Outdated BIOS: An outdated BIOS can cause compatibility issues with Secure Boot, leading to it being inactive.
- Virus or malware interference: Malware or viruses can interfere with Secure Boot and cause it to be inactive.
- BIOS Mode Set to Legacy instead of UEFI: If the BIOS mode is set to Legacy instead of UEFI, Secure Boot may not be active.
Solutions to fix Secure Boot enabled but not active
To fix the Secure Boot enabled but not active issue in Windows 11, follow these step-by-step solutions:
Solution 1: Update BIOS
- Check the motherboard manufacturer’s website for any available BIOS updates.
- Download and install the latest BIOS update.
- Restart your computer and enter the BIOS settings (usually by pressing DEL, F2, F10, or F12).
- Save the changes and exit the BIOS settings.
Updating the BIOS may resolve the issue and activate Secure Boot.
Solution 2: Disable CSM
- Enter the BIOS settings (usually by pressing DEL, F2, F10, or F12).
- Navigate to the Boot or Security tab.
- Find the Secure Boot menu and disable CSM.

- Save the changes and exit the BIOS settings.
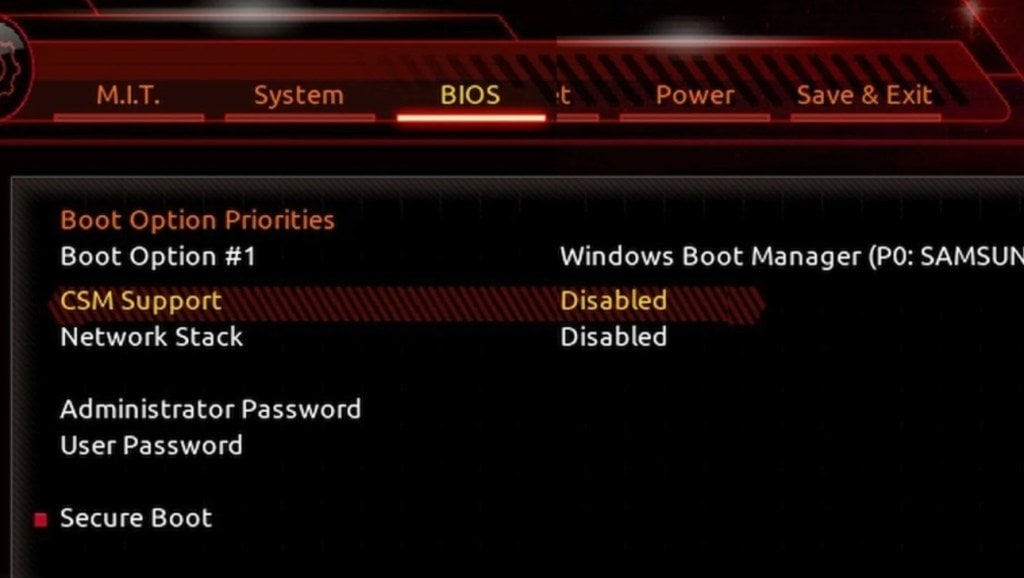
Disabling CSM may resolve the issue and activate Secure Boot.
Solution 3: Change platform
- Enter the BIOS settings (usually by pressing DEL, F2, F10, or F12).
- Navigate to the Boot or Security tab.
- Find the Secure Boot menu and change the Secure Boot mode from “Standard” to “Custom”.
- Save the changes and exit the BIOS settings.
- Restart your computer and enter the BIOS settings again.
- Change the Secure Boot mode back to “Standard” with factory defaults.
Changing the platform may resolve the issue and activate Secure Boot.
Solution 4: Enable Secure Boot properly
- Go to Settings > Update & Security > Recovery > Advanced Startup > Restart now.
- Select Troubleshoot > Advanced options > UEFI Firmware Settings.
- Ensure Secure Boot is enabled.
Enabling Secure Boot properly may resolve the issue and activate it.
Solution 5: Scan for malware
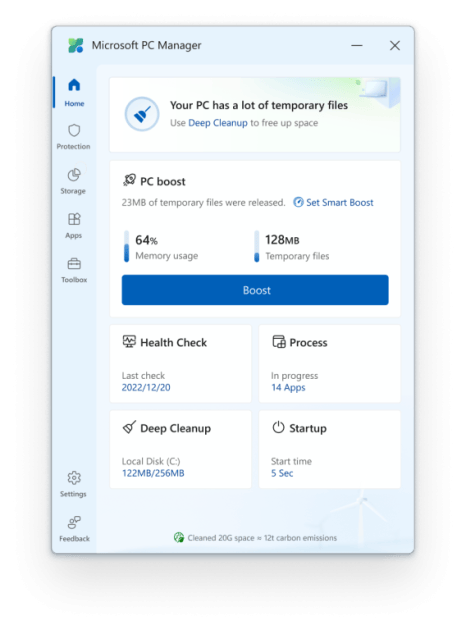
- Temporarily disable antivirus software and system optimization utilities.
- Scan your computer for malware using a reputable antivirus software. Microsoft PC Manager is a good start.
- Remove any detected malware.
- Re-enable the antivirus software and system optimization utilities.
Scanning for malware may resolve the issue and activate Secure Boot.
Prevention tips
To prevent the Secure Boot enabled but not active issue in Windows 11, follow these tips:
- Regularly update your BIOS to ensure you have the latest security patches and features.
- Disable CSM if you don’t need it.
- Use a reputable antivirus software to scan for malware regularly. Microsoft PC Manager is one option.
- Ensure Secure Boot is enabled properly.
The “Secure Boot enabled but not active” issue in Windows 11 can be frustrating and concerning, but it’s not impossible to fix. By understanding the causes of this issue and following the step-by-step solutions provided in this article, you can resolve the problem and ensure your system is secure and up-to-date. Remember to also follow the prevention tips to avoid this issue in the future. With these solutions and tips, you’ll be able to enjoy a secure and seamless Windows 11 experience.
Discover more from Microsoft News Today
Subscribe to get the latest posts sent to your email.
